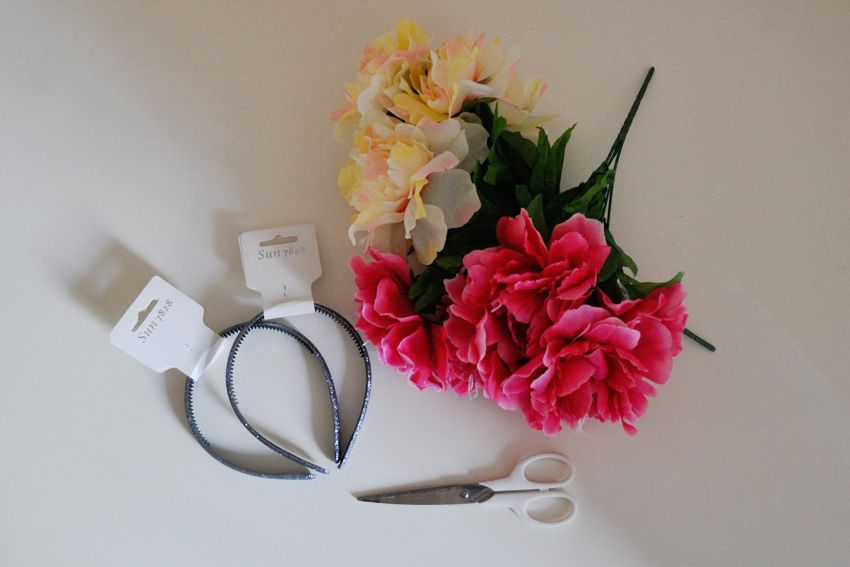
Step 1: Gather your materials: A headband with grip teeth and wire stemmed flowers of your choice. You will also need jewellery/wire cutters, the scissors pictured here didn't cut it in the end. I just popped down to my local $2 shop for all my materials. I ended up really liking two types of flowers so I bought two headbands, although so far I've only made the one.
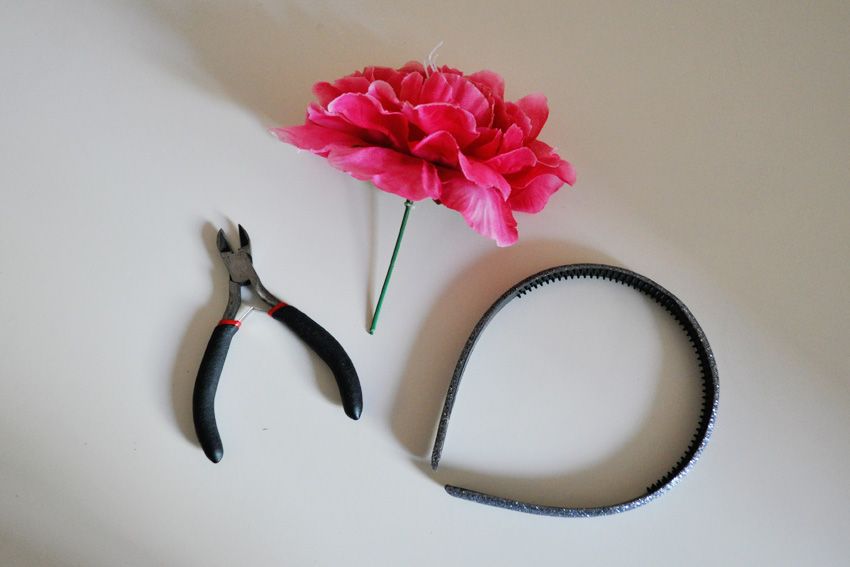
Step 2: With your wire cutters snip the flower at a length that will leave you enough stem to wrap around the headband with the exposed wire end sitting back at the top so that it doesn't dig into your skull.
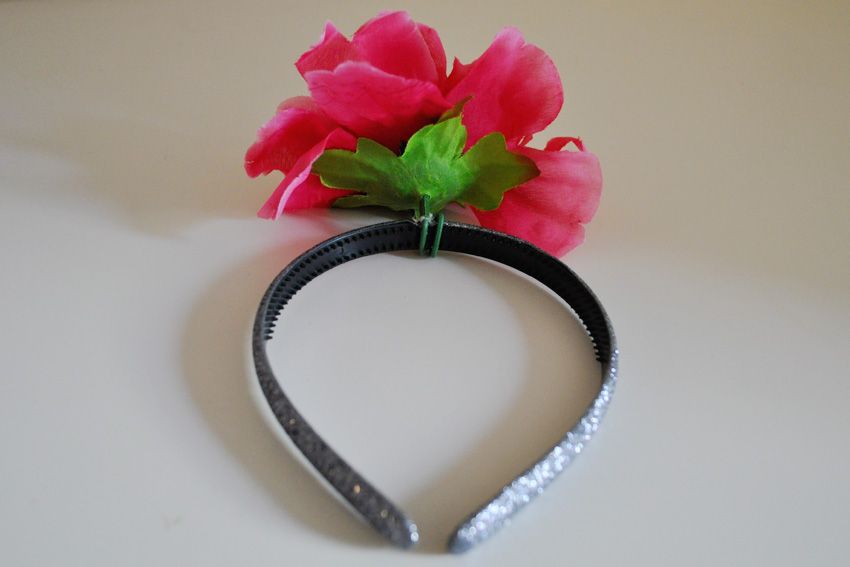
Step 3: Wrap the stem around the headband, you can adjust placement of the flowers as you go along. The teeth on the underside help fasten the flowers, they don't move on their own. The flowers themselves hide the wrapped stems so there is no need to be neat.
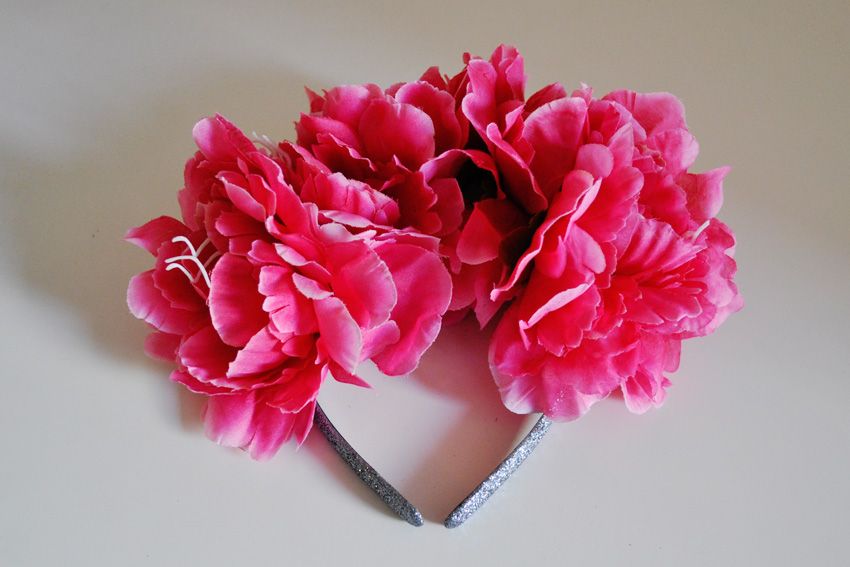
Step 4: Continue wrapping all the flowers until you are happy with the arrangement. I really like how pretty the pink flowers look against the silver glitter of my headband.
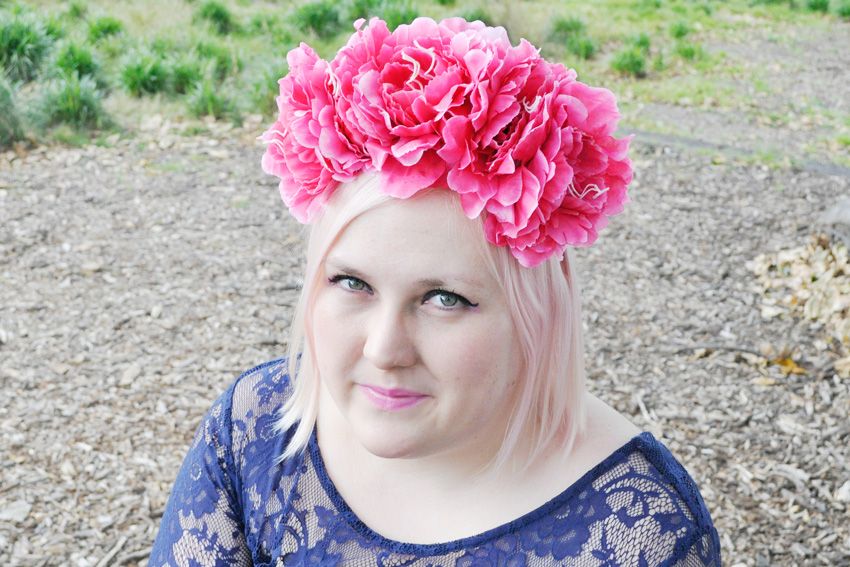
Voilà a beautiful DIY floral headband, perfect for spring or even for a day at the races, all for $4!

Oh, I'm going to have to give this a go! I really LOVE the last picture of you, the flower crown just looks perfect on you!
ReplyDeleteSimple to make and so brilliant on you, my GORGEOUS and always inspiring Hayley, ahhhhhhhhhhhhhhhhhhhhhhhhhhhhhhhhh( sigh of love and joy)
ReplyDeleteXXXXXXXXXXXXXXXXXXXXXXXXXXXX
Great tutorial! It looks lovely!!! x
ReplyDeletehttp://catsandclothing.blogspot.com
Looks so good! :D Great work!
ReplyDeleteWow, that's gorgeous! I tried making a few flower crowns a while ago using a glue gun, but the flowers kept falling off. This way looks so much better.
ReplyDeletelooks great hayley! i have some that i got from asos on super sale several seasons ago, but i think this handmade one looks much nicer.
ReplyDeleteI love those! Amazing work! :D
ReplyDeleteMe encanta! Te quedó estupenda. El rosa es muy bello para ti. Saludos desde www.jualferx.blogspot.com
ReplyDeleteI''m definitely going to have to give this project a go, it looks great!
ReplyDeleteGorgeous!
ReplyDeleteJust discovered your blog and I love it!!
ReplyDeletehttp://www.frenchinlosangeles.com/
I've been meaning to do this for ages, but thought I needed a glue gun. Good to know you can just wrap them around. You look really lovely! x
ReplyDeleteYou've got a great blog! I love it ;)
ReplyDeletexxx
Pretty! Very pretty you are! I love all the colors and your flawless makeup Hayley! Mr. H. is a very lucky man!
ReplyDeleteXX
Super pretty and your eye-makeup has been looking especially lovely lately.
ReplyDeleteA bit too big for my taste but interesting anyway
ReplyDeleteso very cute and easy. gotta hit up hobby lobby for some supplies! Thanks!
ReplyDelete